How to Make a Solar System Model (3 Ways)
By the School Project Lab Team · Updated · 6 min read · Elementary (K–5)
In this guide
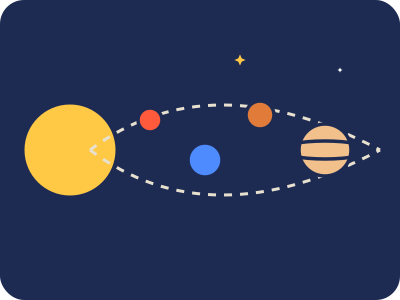
A solar system model is one of the most common elementary school projects, and it is very doable at home in a weekend or two. Below are three proven ways to build one: a hanging mobile, a flat display board, and a scale distance model you can walk. Pick the one that fits your child's assignment, your space, and how much time you really have.
Before You Start: What the Teacher Wants
Read the assignment sheet together before buying anything. Some teachers want a 3D model, some accept a poster, and some want the planets labeled with facts like size, number of moons, or distance from the Sun. If the sheet says "to scale," ask the teacher whether that means size, distance, or neither, because true scale for both is impossible on a desk.
Next, make a short planet list with your child. The order is Mercury, Venus, Earth, Mars, Jupiter, Saturn, Uranus, Neptune. A handy memory sentence is "My Very Educated Mother Just Served Us Nachos." Let your child write the list and keep it on the table while working. This is the backbone of every version of the project.
Finally, decide who does what. Your child should paint, label, measure and arrange. You handle anything with a hot glue gun, a craft knife, or a drill. That split keeps the project honest and safe, and teachers can usually tell when a child built their own model.
Way 1: The Hanging Mobile (Classic 3D Model)
This is the version most people picture. Foam balls become planets, and they hang from a ring or crossed dowels with fishing line.
Supplies
You will need foam balls in several sizes, kid-safe acrylic paint, brushes, wooden skewers for holding balls while painting, fishing line or thin string, two wooden dowels or a foam ring, and a larger ball or half-ball for the Sun. A little glitter glue or white paint flecks make the planets look more realistic.
Steps
- Sort the foam balls from smallest to largest. Jupiter gets the largest, then Saturn, then Uranus and Neptune (similar size), then Earth and Venus (similar), then Mars, then Mercury as the smallest.
- Push a wooden skewer into each ball so your child can hold it while painting. Stand the skewers in a cup of dry rice or a block of scrap foam to dry.
- Paint each planet. Mercury is gray, Venus pale yellow, Earth blue with green and brown patches, Mars rusty red, Jupiter striped in tan and orange, Saturn pale gold, Uranus pale blue-green, Neptune deeper blue.
- Let the first coat dry fully, then add details like Jupiter's big red spot or Earth's white clouds.
- Make Saturn's rings from a circle of cardstock or a thin foam sheet. Cut a hole in the middle the size of the planet and slide it on. An adult can add a dab of hot glue to hold it.
- Cross two dowels into an X and tie or glue the center. An adult should handle the glue.
- Cut fishing line in different lengths. Tie or glue one end to each planet and the other end to the dowels, with the Sun at the center and planets moving outward in order.
- Hang it from a hook and adjust the line lengths so it balances.
Balancing is the trickiest part. If one side droops, slide planets closer to the center or add a small planet on the opposite arm. Let your child experiment with this, because it is actually a small physics lesson.
Way 2: The Flat Display Board Model
A flat model is easier to transport and works well when the teacher wants facts on display. It also avoids the tangled fishing line problem on the bus.
Steps
- Use a sturdy foam board or a tri-fold board painted black or dark blue. Let it dry.
- Splatter white paint with an old toothbrush to make stars. Do this outside or over newspaper.
- Place the Sun on the left edge as a large half circle. Paper, felt, or a foam half-ball all work.
- Cut planet circles from cardstock or use foam half-balls glued flat. Arrange them left to right in order.
- Under each planet, add a small label card with its name and two or three facts your child looked up, such as whether it is rocky or gassy, how many moons it has, or a fun feature.
- Draw thin orbit lines with a white gel pen or chalk marker if you want a more finished look.
This version is great for younger kids who get frustrated with balancing a mobile. It also gives more room for writing, which many teachers grade on.
Parent tip: Have your child look up facts from a children's encyclopedia or a space agency kids' page and write them in their own words. If they copy a sentence word for word, it is a good moment to talk about why we put things in our own words.
Way 3: The Scale Distance Walk
This version teaches the most surprising lesson: space is mostly empty. Instead of building a model to put on a desk, your child lays out the planets along a hallway, sidewalk, or field at scaled distances.
How It Works
Choose a scale where Neptune ends up at a distance that fits your space. Your child can use published average distances from the Sun and divide them all by the same number. For example, if Neptune is placed at the end of a long sidewalk, the inner four planets will all bunch up very close to the Sun, which is the point of the lesson.
Steps
- Look up the average distance of each planet from the Sun with your child.
- Pick the total space you have, then divide to find your scale. A calculator is fine.
- Make small planet markers from paper plates, rocks painted with planet colors, or cards on craft sticks.
- Measure out the distances with a tape measure or by counting steps of a known length.
- Take photos of each marker and your child standing at it.
- Turn the photos into a small poster or slide show for class, with a short paragraph about what surprised them.
If you do this outside on a sidewalk, stay away from streets and driveways, and have an adult present. Chalk works well for marking planet spots on pavement.
Labeling, Presentation and Common Mistakes
Labels make or break the grade. Use clear printed or neatly written labels, and keep fonts large enough to read from a few feet away. A small key card that says what the model shows ("planets in order, sizes not to scale") prevents confusion.
Common mistakes to avoid:
- Putting the planets in the wrong order, especially swapping Uranus and Neptune.
- Making Earth bigger than Venus by a lot. They are close in size.
- Forgetting Saturn is not the only planet with rings. Jupiter, Uranus and Neptune have faint rings too, which is a great bonus fact.
- Paint that is still wet when transported. Give it a full day.
- Mobiles packed loosely, which tangle. Wrap each planet in a paper towel and carry the mobile in a box.
When your child presents, ask them to practice a 30-second explanation: what the model shows, one surprising fact, and what was hardest to build. Practicing at the dinner table builds confidence.
Quick Checklist
Tap the boxes as you go — progress saves on this device only.
- Read the assignment with a grown-up
- Write the planets in order
- Choose mobile, board, or distance walk
- Gather supplies
- Paint the Sun and planets
- Let the paint dry all the way
- Add Saturn's rings
- Make labels with facts in your own words
- Put the model together with an adult helper
- Practice telling about your model
Time and Cost Estimate
| Item | Hanging Mobile | Flat Board | Distance Walk |
|---|---|---|---|
| Prep time | 30 to 45 minutes | 30 minutes | 45 minutes (research and math) |
| Build time | 3 to 5 hours over 2 days | 2 to 3 hours | 1 to 2 hours plus photo time |
| Typical cost | $15 to $30 | $10 to $25 | $5 to $15 |
| Difficulty | Medium | Easy | Medium |
Foam ball packs and acrylic paint are the main costs. If you already have paint and a board at home, the flat model can cost almost nothing. Whatever version you choose, the best solar system model is one your child built, can explain, and is proud to carry into class.
Frequently asked questions
What is the easiest solar system model to make?
A flat poster model with painted paper circles is the easiest and fastest. It takes one or two afternoons and needs no hanging hardware or drying racks.
Do the planets need to be to scale?
Usually not, unless your teacher asks for it. Most school models show the correct order and relative size differences, and a short note on the display explains that true scale would be far too big.
How many planets should a solar system model have?
Include the eight planets: Mercury, Venus, Earth, Mars, Jupiter, Saturn, Uranus and Neptune, plus the Sun. You can add Pluto as a labeled dwarf planet if your child wants to explain why it was reclassified.