Timeline Project Ideas and How to Lay One Out
By the School Project Lab Team · Updated · 5 min read · All grades
In this guide
A timeline project shows events in the order they happened, with dates, short descriptions and often pictures. The key to a great timeline is choosing a clear topic, picking the right number of events and spacing them accurately using a scale. Below are timeline ideas for every grade, a step-by-step layout method and creative formats that go beyond a simple line.
Timeline Project Ideas by Grade
Always check your teacher's assignment first. These ideas can spark a topic if you have a choice.
Elementary School
- My life timeline: Birth, first steps, starting school, a new sibling, a favorite trip
- A day in my life: Hour-by-hour events from waking up to bedtime
- Life of a famous person: Five to eight big moments in a biography
- Plant or animal life cycle: Seed to plant, egg to butterfly
- History of a holiday: How a celebration began and changed
Middle School
- Major historical period: The American Revolution, the space race or the civil rights movement
- History of an invention: Phones, cars, computers or airplanes
- A country's history: Key events in the history of a nation
- Science discoveries: Major advances in medicine, astronomy or genetics
- Sports or music history: How a sport or musical genre developed
High School
- Comparative timelines: Two parallel timelines showing events in different regions at the same time
- Cause-and-effect timeline: Showing how one event led to another
- Political or social movement: Key laws, court cases and turning points
- Technology and society: How a technology changed daily life over decades
- Literary period: Major works and events that influenced writers
Step-by-Step: How to Lay Out a Timeline
- Pick your topic and time span. Decide the start and end dates. A narrower span is often easier to show in detail.
- List your events. Research and write each event on a sticky note or index card with its date.
- Put events in order. Arrange cards from earliest to latest on a table or floor.
- Choose the most important events. If you have too many, keep the ones that best tell the story.
- Choose your scale. Measure the length of your poster or paper. Divide by the number of years. For example, a 36-inch line covering 36 years means one inch per year.
- Draw the main line. Use a ruler or meter stick to draw a straight line across the paper.
- Mark the intervals. Make small tick marks at regular intervals, such as every year or every ten years, and label them.
- Place each event. Measure where each date falls and mark it. Draw a short line from the timeline to a label box.
- Write short descriptions. Include the date, a short title and one or two sentences.
- Add images. Draw or print pictures that help tell the story.
- Add a title and key. Make the title large, and add a color key if you used colors for categories.
Here is a quick scale example. Say your timeline covers 1950 to 2000, which is 50 years, and your paper is 50 inches long. One inch equals one year, so an event in 1969 goes 19 inches from the start. If your paper is only 25 inches, each inch equals two years, and 1969 lands at nine and a half inches. Write the scale in a small corner note so viewers understand it.
Accurate spacing is what separates a true timeline from a list. If one decade has many events and another has few, the spacing should show that.
Parent tip: Before your child draws anything, lay the event cards on the floor and let them physically walk along the timeline. Saying "First this happened, then this" out loud helps them understand sequence and spot gaps in their research. It is quick, active and surprisingly effective.
Dealing With Crowded or Long Timelines
Sometimes events bunch together, or the time span is huge. Here are fixes:
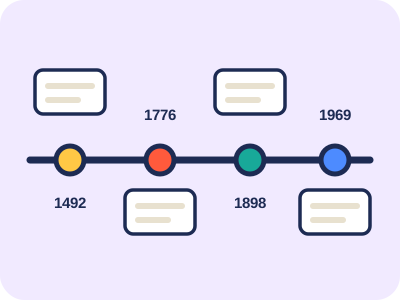
- Alternate sides. Put labels above and below the line in a zigzag to save space.
- Use a break symbol. If nothing happens for a long period, draw two small slashes on the line to show skipped time, and explain it in a note.
- Zoom in. Create a small inset timeline to show a busy period in more detail.
- Use color categories. For example, blue for political events, green for science, orange for culture. Add a key.
- Keep text short. A timeline is not an essay. Use short phrases and save details for the presentation.
Creative Timeline Formats
A timeline does not have to be a single line on a poster. Choose a format that fits the grade and assignment.
- Poster timeline: The classic version, great for classroom display.
- Banner or scroll: A long roll of craft paper that unrolls across a wall or table.
- Clothesline timeline: String hung across a space with event cards clipped on by clothespins. Great for younger kids.
- Accordion book: A folded strip of paper where each panel shows one event.
- Circular timeline: For cycles like seasons or life cycles.
- Vertical timeline: Running from top to bottom, often used in booklets or digital slides.
- Digital timeline: Made with slides or a drawing program. Great for older students, with image credits included.
Scissors, rulers, glue sticks and markers are safe for most students. If you use a craft knife to cut foam board or hang a heavy banner with tools, an adult should handle that step.
Time and Cost Estimate
| Item | Estimate |
|---|---|
| Research and event list | 1 to 4 hours |
| Planning the layout | 30 to 60 minutes |
| Building the timeline | 2 to 5 hours |
| Typical cost | $3 to $20 |
| Difficulty | Easy to moderate |
Most timelines need only paper, a ruler, markers, glue and printed images. A roll of craft paper or poster board is the main purchase. Clothespins and string are inexpensive and reusable.
Quick Checklist
Tap the boxes as you go — progress saves on this device only.
- Pick your topic
- Decide the start and end dates
- Write each event on a card
- Put cards in order
- Choose your scale
- Draw a straight line with a ruler
- Mark the years evenly
- Place each event in the right spot
- Add short labels and pictures
- Add a big title
- Check every date twice
Presenting Your Timeline
When presenting, walk the audience through the timeline from start to finish. Point to each event and explain why it matters, not just when it happened. Older students can highlight turning points and explain how earlier events led to later ones.
A short conclusion helps, too. What pattern do you see? What changed most over time? What do you think might come next?
Finally, keep the work honest. Students should research, choose and place the events themselves. Parents can help measure and supervise cutting, but the thinking should belong to the student. A timeline built by the child, even with a few wobbly lines, shows real learning and gives them something to be proud of.
Frequently asked questions
How many events should a timeline have?
It depends on the assignment and grade. Younger students often do well with five to eight events, while older students may include ten to twenty. Always follow your teacher's requirements.
How do I space events on a timeline?
Choose a scale, like one inch for one year or one inch for ten years, then measure each event's position. Even spacing by time makes the timeline accurate and easy to read.
What is the easiest timeline format for young kids?
A clothesline timeline with cards hung by clothespins or a simple paper strip with drawings works well. Young children can move cards around before deciding the order.