Simple Circuit Projects for Kids (Safe Battery Builds)
By the School Project Lab Team · Updated · 6 min read · Middle School (6–8)
In this guide
A simple circuit project is one of the best ways for a middle schooler to understand electricity, and it can be done safely with nothing stronger than AA or 9V batteries. In this guide your teen will build a basic LED circuit, add a switch, test which materials conduct electricity, and make a steady hand game. Every project here is low voltage only, and we start with the safety rules that make that possible.
Safety Rules Come First
Before your teen touches a wire, go over these rules together and keep them posted at the work table.
- Low-voltage batteries only. Use AA, AAA or 9V batteries in a proper holder or snap connector. That is all.
- Never use wall outlets, plugs, extension cords, chargers, power adapters or anything from the house wiring. Household electricity can seriously injure or kill. It is never part of a school circuit project.
- No car batteries, lithium battery packs, phone or laptop batteries, or rechargeable tool batteries. They can deliver dangerous current, overheat or catch fire.
- Never connect a wire straight from the positive end to the negative end with nothing in between. That is a short circuit. The wire and battery can get hot fast. Always have an LED, bulb, buzzer or resistor in the loop.
- If anything gets warm, disconnect the battery right away. A warm battery or wire means something is wrong.
- Do not take batteries apart, mix old and new batteries, or put batteries in your mouth. Keep coin batteries away from young siblings, since swallowing one is a medical emergency.
- Wear safety glasses and work on a dry table with dry hands.
- An adult supervises every build.
These rules are not there to scare anyone. Small batteries are a safe and common way to learn electronics, and following the rules keeps it that way.
How a Circuit Works
A circuit is a complete loop. Electric current flows out of one end of the battery, through wires and parts, and back into the other end. If the loop is broken anywhere, nothing happens.
Three words your teen should know:
- Voltage is the push that moves the current. A AA battery gives about 1.5 volts. A 9V battery gives about 9 volts.
- Current is how much electricity is flowing.
- Resistance slows the current down. A resistor is a small part that adds resistance to protect other parts.
LEDs (light-emitting diodes) are perfect for beginners because they use very little power. They have a longer leg (positive, called the anode) and a shorter leg (negative, called the cathode). They only light when connected the right way.
Four Safe Battery Builds
Each build below uses the same small battery holder and adds one new idea. Do them in order, since each one builds on the last.
Project 1: Light an LED
Supplies
A two-AA battery holder with wires, an LED, a small resistor (a value in the low hundreds of ohms is common for this), and alligator clip leads.
Steps
- Put two AA batteries in the holder, matching the plus and minus marks.
- Clip one alligator lead to the red (positive) wire of the holder.
- Clip the other end of that lead to one end of the resistor.
- Clip a second lead from the other end of the resistor to the long leg of the LED.
- Clip a third lead from the short leg of the LED to the black (negative) wire of the holder.
- The LED should light. If not, flip the LED around and check every clip.
Have your teen draw the circuit as a diagram with standard symbols. Teachers love seeing a hand-drawn schematic next to the real thing.
Project 2: Add a Switch
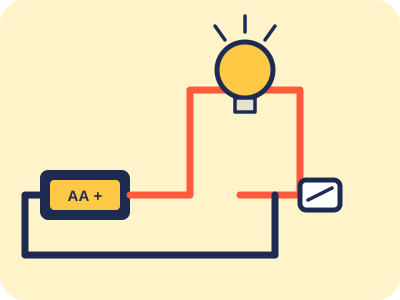
A switch is just a controlled break in the loop. Your teen can make one from cardboard, two brass paper fasteners and a metal paper clip.
- Push two paper fasteners through a piece of cardboard about an inch apart.
- Hook a paper clip around one fastener so it can swing over and touch the other.
- Connect the switch into the circuit from Project 1 by putting it between the battery and the resistor.
- Swing the clip to touch both fasteners: the LED turns on. Swing it away: the LED turns off.
This shows an open circuit (off) and a closed circuit (on) in a way anyone can see.
Project 3: Conductor and Insulator Tester
This one turns the circuit into a real experiment with a question: which household materials conduct electricity?
- Build the LED circuit, but leave one gap with two loose alligator clips.
- Gather test items: a coin, aluminum foil, a pencil lead (graphite), a rubber band, a plastic spoon, a wooden craft stick, a key, a piece of paper, a paper clip.
- Before testing, your teen predicts which ones will light the LED and writes the prediction down.
- Touch both clips to each item. If the LED lights, the item is a conductor. If not, it is an insulator.
- Record the results in a two-column table.
Graphite from a pencil often makes the LED glow dimly, which is a great discussion point about resistance. Only test dry, solid household objects. Do not test liquids, food, or anything that is plugged in.
Parent tip: Let your teen troubleshoot when something does not work before you jump in. Ask "Where could the loop be broken?" and let them trace it with a finger. Learning to find the problem is the most valuable skill in the whole project.
Project 4: Steady Hand Game
This is a fun build that makes a great display.
- Bend a piece of thick, bare craft wire into a wavy shape and push both ends into a block of foam or a cardboard base.
- Make a small loop at the end of a second wire to be the wand. Thread the loop around the wavy wire before you fix the second end of the wavy wire in place.
- Connect the circuit: battery holder, then a small 3V buzzer or an LED with resistor, then the wavy wire. Connect the wand to the other side of the battery.
- When the loop touches the wavy wire, the circuit closes and the buzzer sounds.
Use a two-AA holder for this so the voltage stays low. Players try to move the wand from one end to the other without a buzz. Your teen can test how the shape of the wire changes difficulty and turn that into data.
Presenting the Project
A good circuit display includes:
- The question or goal
- Safety rules followed (teachers notice this)
- A hand-drawn circuit diagram
- Photos of the build
- A data table for the conductor test
- An explanation in your teen's own words of how the circuit works
If the fair allows a live demo, bring fresh batteries and tape down loose wires. For board size and whether batteries are allowed at the table, check your official rulebook or ask the teacher.
Quick Checklist
Tap the boxes as you go — progress saves on this device only.
- Read the safety rules with an adult
- Use only AA or 9V batteries
- Never use a wall outlet
- Put on safety glasses
- Build the LED circuit
- Add a homemade switch
- Predict and test conductors
- Unclip the battery if anything gets warm
- Draw your circuit diagram
- Take the battery out when you finish
Time and Cost Estimate
| Item | Estimate |
|---|---|
| Prep time | 30 minutes (safety talk, supplies) |
| Build time | 1 to 3 hours for all four projects |
| Testing time | 30 to 60 minutes |
| Typical cost | $10 to $25 |
| Difficulty | Easy to medium |
A battery holder, a pack of LEDs, a resistor kit and alligator clips cover almost everything here, and they can be reused for future projects. With the safety rules in place, your teen can build real circuits, understand how electricity moves, and explain it with confidence.
Frequently asked questions
Are battery circuit projects safe for kids?
Yes, when you use only small AA, AAA or 9V batteries and an adult supervises. Never use wall outlets, chargers, car batteries or lithium battery packs, and never connect the two battery ends directly with a wire.
Why does my LED not light up?
LEDs only work one way. Flip the LED around so the longer leg connects toward the positive side of the battery. Also check that every connection is tight and the battery is not dead.
Do I need a resistor with an LED?
With a 9V battery, yes. A resistor protects the LED from too much current. With two AA batteries and a small LED, a resistor is still a good habit and keeps the LED from burning out.