Water Filtration Project for School
By the School Project Lab Team · Updated · 5 min read · Middle School (6–8)
In this guide
A water filtration project shows how layers of gravel, sand and charcoal can trap dirt and make muddy water look clearer. It is a great middle school science project because it is cheap, visual and easy to turn into a fair test. Just as important, it teaches a key lesson your teen should say out loud in the presentation: clear water is not the same as safe water, and filtered water from this project must never be swallowed.
The Most Important Safety Rule
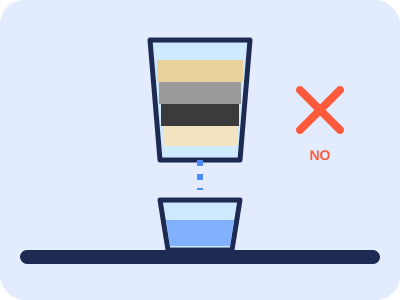
Put this rule at the top of the display and repeat it during every test: do not drink, taste or cook with the filtered water. Not a sip, not even if it looks perfectly clear.
A homemade filter can remove visible particles like soil, leaves and sand. It cannot reliably remove bacteria, viruses, parasites or dissolved substances like salt or chemicals. Real drinking water treatment uses additional steps such as disinfection and testing that a school project does not have.
Other safety rules:
- Use only dirt, soil, leaves and tap water to make the "dirty" water. Never use water from ponds, ditches, puddles, flood water or anything that could contain sewage. Never add soap, cleaning products, oil, paint or chemicals.
- Wear disposable gloves when handling the dirty water and wash hands well afterward.
- Use activated charcoal sold for aquariums, not grill charcoal or briquettes. Grill charcoal can contain additives and should not be used.
- An adult should handle any cutting if you cut plastic bottles. Cut edges can be sharp.
- Dispose of used water by pouring it on a garden bed or down an outdoor drain, and throw away used filter materials in the trash.
- Keep the setup away from younger siblings who might think it is something to drink.
How a Filter Works
Each layer catches different-sized particles.
- Gravel catches large pieces like leaves, twigs and clumps of soil.
- Coarse sand traps smaller grit.
- Fine sand traps even smaller particles that make water cloudy.
- Activated charcoal has many tiny pores. It can trap some particles and can reduce some colors and smells.
- Cotton or a coffee filter at the bottom keeps sand and charcoal from washing out.
This is a simplified model of how natural filtration works when rainwater soaks through layers of soil and rock. Your teen can explain that connection, and also explain why cities still treat and test water before it reaches the tap.
Build the Filter
Supplies
A clean plastic bottle (about 1 to 2 liters) or a large plastic funnel, a clear cup or jar to catch the water, aquarium gravel, play sand, activated charcoal for aquariums, cotton balls or coffee filters, measuring cups, a stopwatch, disposable gloves, and soil or garden dirt.
Steps
- Prepare the bottle. An adult cuts the bottom off the plastic bottle. Turn it upside down so the neck points down, like a funnel. Leave the cap off.
- Rinse the materials. Rinse gravel, sand and charcoal in a strainer with tap water so they do not add their own dust.
- Add the bottom layer. Push cotton balls or a folded coffee filter into the neck.
- Add the charcoal. Pour in a layer of activated charcoal, about an inch or two.
- Add fine sand, then coarse sand. Measure each layer with a cup so it is the same each time.
- Add gravel on top.
- Set it over a clear cup so the neck sits inside the cup's rim.
- Make test water. Stir a measured amount of soil into a measured amount of tap water. Write down the recipe so every test uses identical dirty water.
Your teen should do the layering, measuring and mixing. Parents help with cutting and supervision.
Turn It Into an Experiment
Pick One Question
- Does the order of the layers change how clear the water gets?
- Does adding activated charcoal make the water clearer than sand and gravel alone?
- Does a thicker sand layer filter better but slower?
- Does pouring the water through twice make it clearer?
Variables
- Independent: the one thing you change (for example, layer order).
- Dependent: what you measure (clarity rating and filter time).
- Controlled: same bottle size, same amount of each material, same dirty water recipe, same amount poured.
Test Procedure
- Save a cup of the dirty water as your "before" sample.
- Start the stopwatch and pour a measured amount of dirty water into the filter slowly.
- Stop the timer when the dripping slows to a few drops.
- Line up the "before" and "after" cups against a white card or paper.
- Rate clarity on a 1 to 5 scale. Write a short description too (for example, "light brown, a few specks").
- Take a photo of every sample in the same spot and light.
- Build a fresh filter for each version and run each test three times.
A clarity scale is a simple, honest way to measure without special equipment. Some students also hold a printed word behind each cup and record whether they can read it through the water.
Parent tip: Label every cup with masking tape and a marker the moment it is filled. After several trials, the cups all start to look alike, and labels prevent mix-ups that would ruin the data. It also helps make sure nobody mistakes a cup for drinking water.
Show Results Clearly
Your teen can create a table with columns for the version tested, trial 1, trial 2, trial 3, average clarity, and average filter time. A bar graph comparing the average clarity of each version is easy to read.
The photo lineup is the most powerful part of the display. Arrange "before" and "after" pictures side by side for each version.
The conclusion should answer the question and then add the safety message: "Even our clearest sample is not safe to drink, because this filter cannot remove germs or dissolved chemicals." Teachers appreciate that level of understanding.
Possible extension: research how real water treatment plants clean water, and compare those steps to your filter in a short chart. For display size rules or whether liquids are allowed at the fair, check your official rulebook or ask the teacher. Photos may be the better choice for the fair table.
Quick Checklist
Tap the boxes as you go — progress saves on this device only.
- Read the project rules with a parent
- Remember: never drink the filtered water
- Put on gloves
- Have an adult cut the bottle
- Rinse the sand, gravel and charcoal
- Add layers and measure each one
- Mix the same dirty water every time
- Time how long the water takes
- Rate how clear it looks
- Take photos of every cup
- Label the cups
- Wash your hands when done
Time and Cost Estimate
| Item | Estimate |
|---|---|
| Prep time | 30 to 45 minutes |
| Build time | 30 to 60 minutes per filter |
| Testing time | 1 to 2 hours for all trials |
| Typical cost | $10 to $25 |
| Difficulty | Easy to medium |
Sand, gravel and aquarium charcoal are inexpensive and go a long way. With careful measurement, honest data and the right safety message, your teen's water filtration project can show both how filters work and why safe drinking water takes more than a bottle full of sand.
Frequently asked questions
Is water from a homemade filter safe to drink?
No. Never drink water from a homemade filter, even if it looks clear. A sand and charcoal filter can remove dirt you can see, but it does not remove germs or dissolved chemicals that can make you sick.
What is the best order for layers in a homemade water filter?
A common order from top to bottom is gravel, coarse sand, fine sand, activated charcoal, then cotton or a coffee filter at the bottom. Testing different orders makes a great experiment.
How do I measure how well the filter works?
Compare samples side by side against a white card, rate clarity on a simple scale, time how long the water takes to pass through, and photograph each sample in the same light.